Follow Me On Social Media!
Onion Skin Easter Eggs: The Best Natural Dye Secret!
Introduction to Onion Skin Easter Eggs
There’s something undeniably enchanting about crafting onion skin Easter eggs, a tradition that evokes a sense of nostalgia and creativity. As the spring season awakens nature, it beckons us to celebrate with vibrant colors and joyful festivities. I vividly remember my childhood, gathering with friends and family, our hands stained with earthy hues, laughing and sharing the magic of dyeing eggs naturally. It’s a beautiful experience that can reconnect you with the simple joys of life, and it turns your kitchen into a canvas of color and charm.
The art of dyeing eggs using onion skins is not just about aesthetics; it holds deeper meanings and lessons. For centuries, families have embraced this eco-friendly method, creating unique and intricate designs that often tell a story. The golden hues derived from brown onion skins or the rich reds from red onions reflect both the colors of spring and the warmth of human connection. It’s a gentle reminder that beauty can emerge from nature, transforming plain eggs into stunning decorations.
Beyond their visual appeal, onion skin eggs can hold special significance for various cultures, symbolizing rebirth and renewal. Have you ever considered how such a simple activity can imbue your gathering with a deeper sense of purpose? It invites storytelling and sharing, as each dyed egg carries its own narrative, bringing history and inspiration into your home.
Not to mention, the process of making onion skin Easter eggs is surprisingly simple and enjoyable. With just a few ingredients—onion skins, eggs, and natural modifiers for the dye—you can embark on a delightful adventure that’s perfect for family activities or quiet creative time alone.
In the coming sections, we’ll dive into the specifics of how to create these enchanting eggs, focusing on the ingredients and steps needed to enrich your experience. So, grab your onion skins, let’s get crafting, and rediscover the joy of a cherished tradition!
Key Ingredients for Onion Skin Easter Eggs
Onion skin Easter eggs are not just a festive tradition; they encapsulate the warmth and creativity of the season. Crafting these natural dyed eggs creates a unique atmosphere, adding character to your home while engaging in a fun activity. The beauty lies in the simplicity and ease of the ingredients you’ll need.
-
Eggs: Fresh, organic eggs work best as they create a stronger base for the dye, resulting in vibrant and clear colors. Choose white shells for a more striking contrast, but brown eggs can yield their own earthy tones.
-
Onion Skins: Collect dried yellow onion skins, which release rich, natural pigments when boiled. The deeper the color of the skins, the more vibrant your dye will turn out.
-
Vinegar: A crucial component, vinegar helps to set the dye. This ensures your colors stay bright and won’t fade after drying.
-
Water: You’ll need enough water to cover your eggs and onion skins during the boiling process.
With these simple yet effective ingredients, you’re well on your way to creating beautiful onion skin Easter eggs that tell their own story of spring and renewal.
Why You’ll Love This Recipe
Creating onion skin Easter eggs is not just a delicious way to celebrate the holiday; it’s also a delightful journey into the world of natural dyeing. Imagine gathering with friends or family, surrounded by pots of boiling onion skins, as the room fills with laughter and the vibrant colors start to emerge. The process brings about a sense of nostalgia, making it an experience to remember.
-
Eco-Friendly Appeal: This recipe celebrates sustainability by using ingredients that would otherwise be discarded. You’ll feel great knowing you’re minimizing waste while crafting something beautiful.
-
Unique Designs: Unlike commercial dyes, using onion skins gives each egg a one-of-a-kind pattern, making your creations not only colorful but also artistically unique. Every egg tells a story!
-
Fun for All Ages: Whether you’re a seasoned crafter or trying this for the first time, dyeing eggs with onion skins is engaging for everyone. It’s a fantastic way to connect with loved ones—all while making something truly special.
-
Rich in Tradition: The art of dyeing eggs has been practiced for centuries in various cultures, adding a layer of historical significance to your Easter traditions. You’ll appreciate the deep-rooted customs that come into play with every egg you dye.
By diving into the world of onion skin Easter eggs, you’re not just following a recipe—you’re creating memories and embracing a beautiful artisanal craft.
Variations on Onion Skin Easter Eggs
Creating onion skin Easter eggs is a delightful way to celebrate the season, and exploring variations can spark even more creativity in your festivities. Each twist adds a unique charm to your egg-dyeing adventures, making this tradition even more special.
Experimenting with Different Onion Varieties
While yellow onions are the most common choice for dyeing, experimenting with red and white onions opens up a whole new aesthetic. Red onion skins produce a beautiful bluish-purple hue, perfect for adding a pop of color to your Easter display. White onion skins yield a more subtle yellowish tint, which can be combined with yellow onion skins for varied depth and texture.
Natural Additives for Unique Shades
Don’t hesitate to enhance your dye baths! Adding a few natural ingredients can yield stunning results:
- Turmeric: This spice not only enhances the yellow shades but also infuses a warm aroma into your dye.
- Beet Juice: Available at most grocery stores, beet juice can transform your eggs into a gorgeous crimson shade.
- Coffee Grounds: For a deep brown color, simmer coffee grounds with your onion skins to achieve a rustic look.
Printing and Stamping Effects
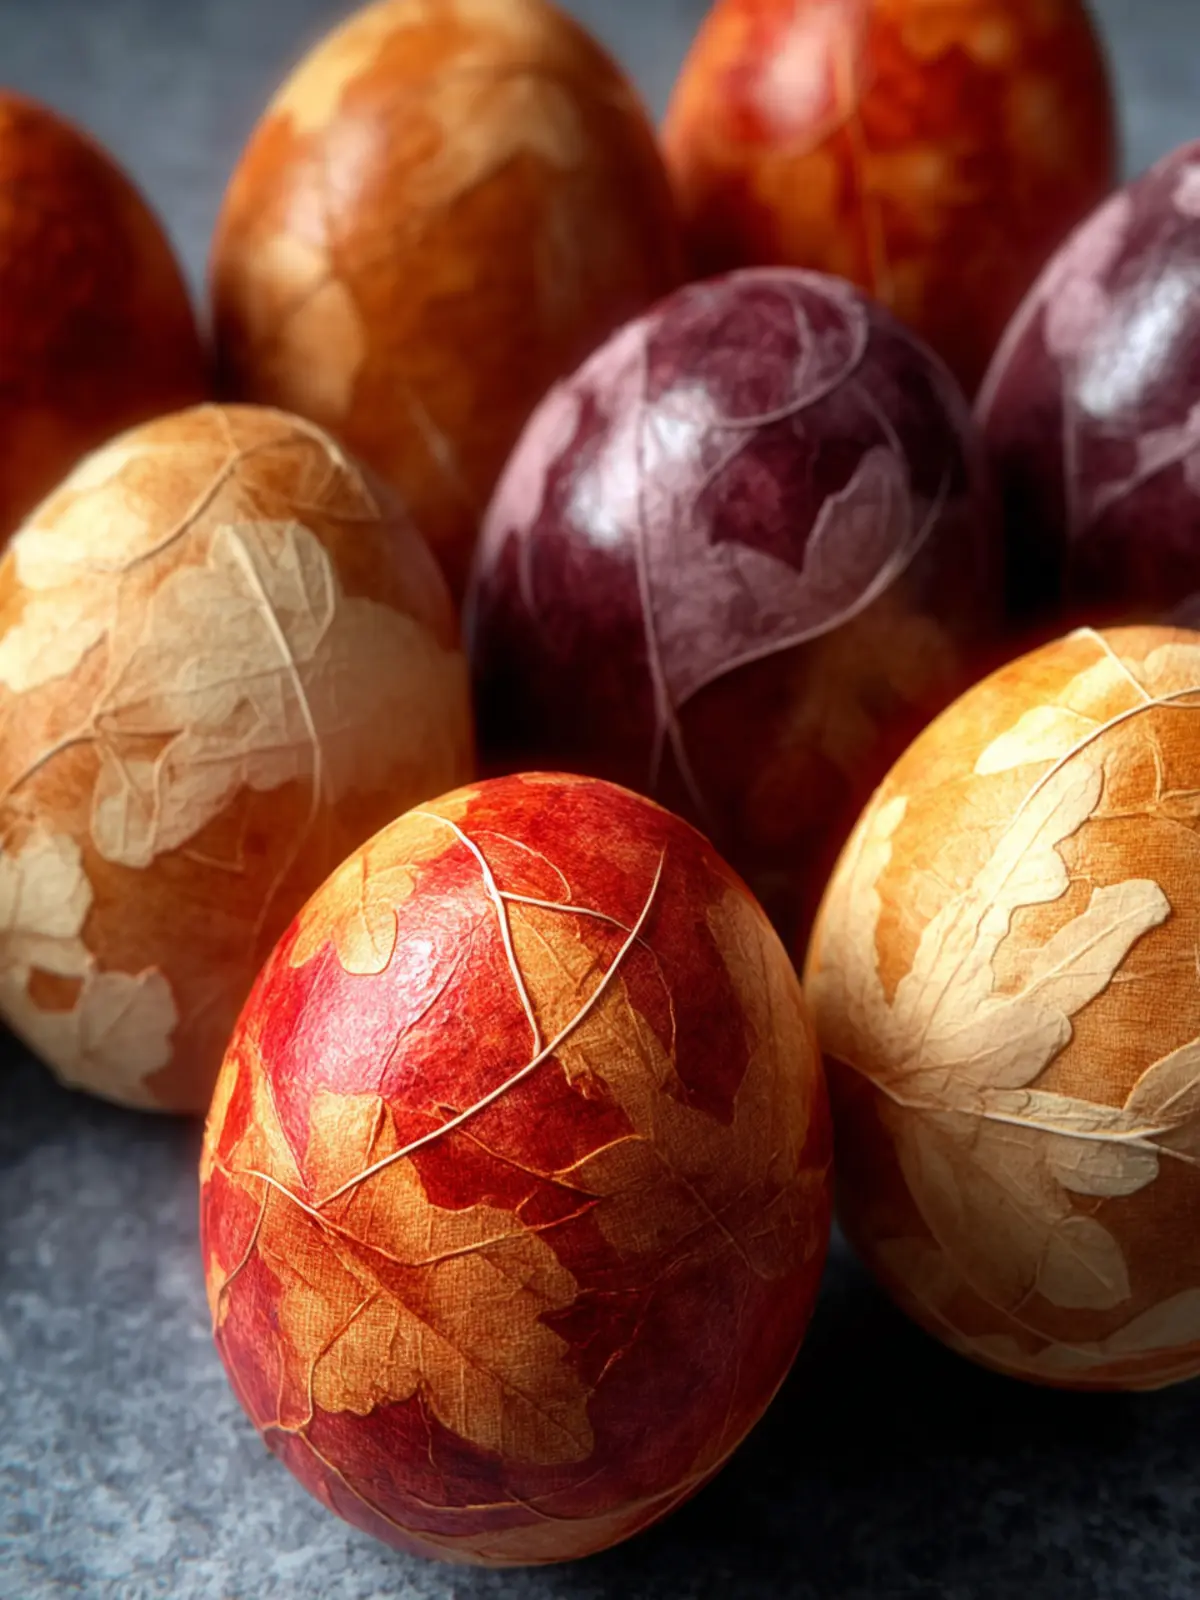
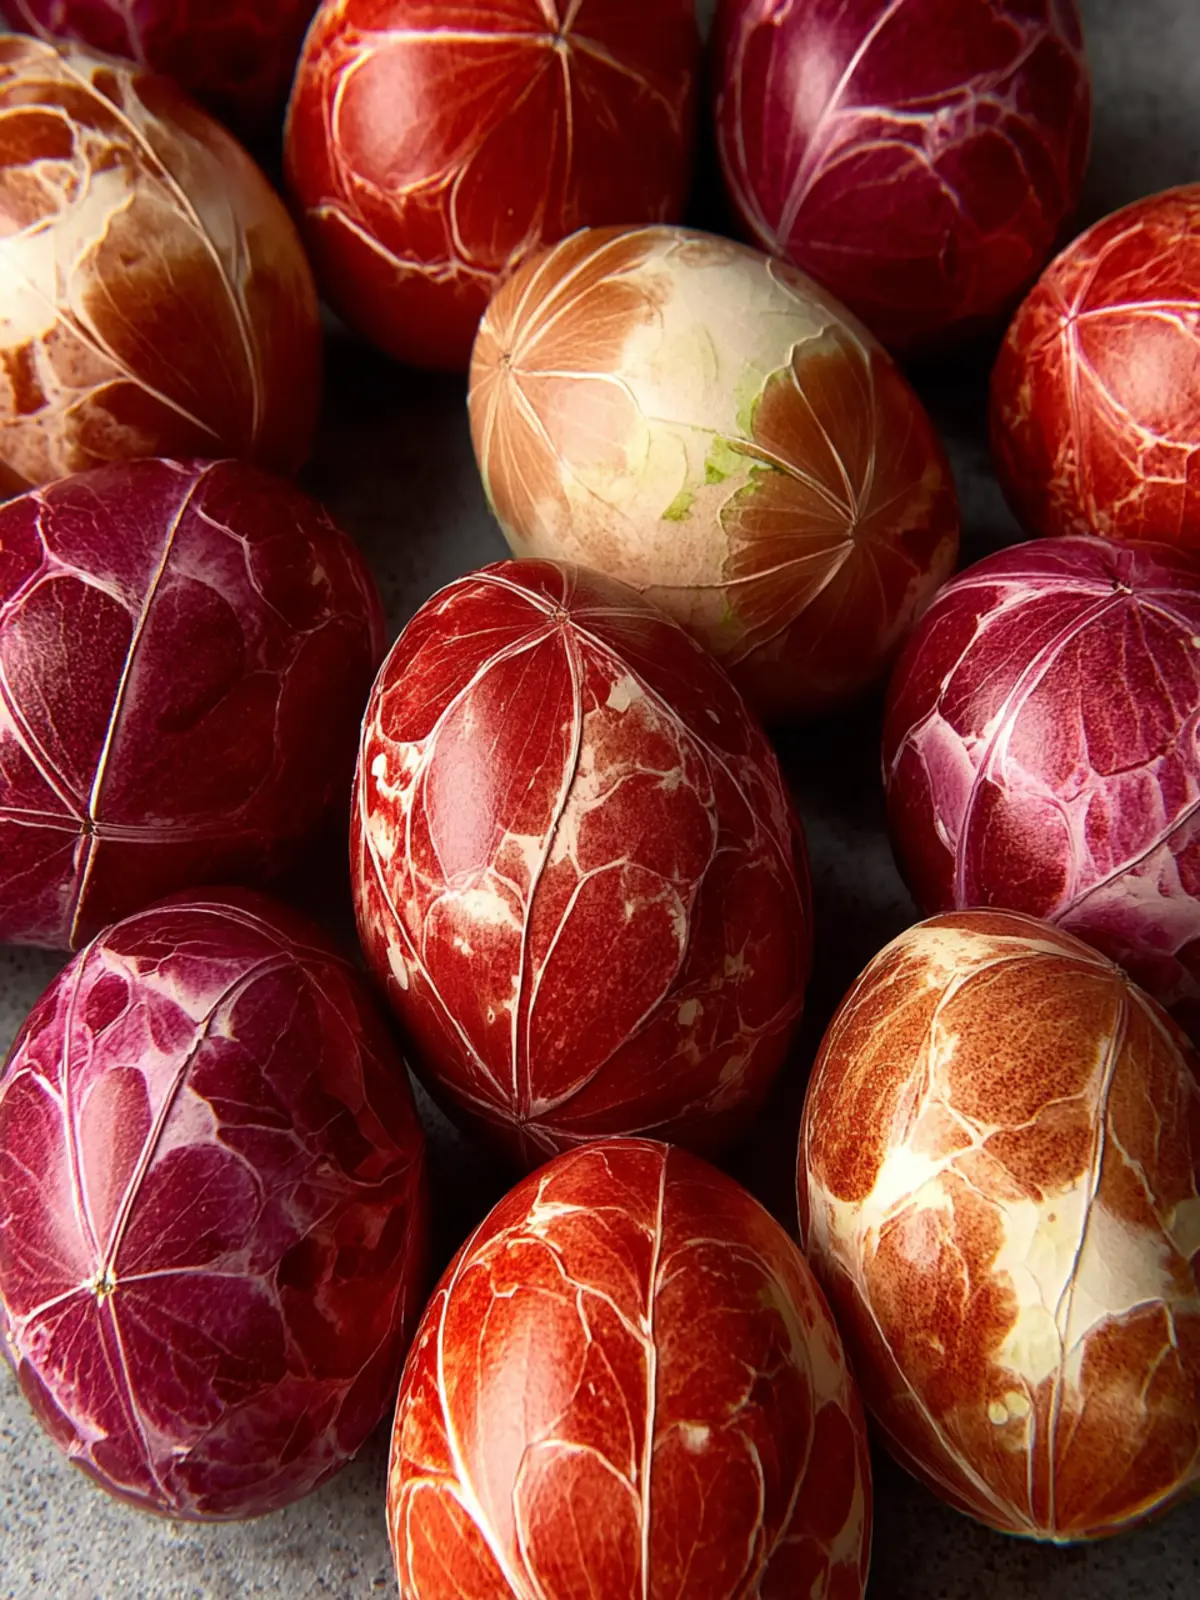
Want to take your onion skin Easter eggs to another level? Consider wrapping your eggs with leaves or delicate flowers before submerging them in the dye. The result? Beautifully stamped designs that mimic nature’s own artistry. Alternatively, use rubber bands to create patterns, turning each egg into a unique work of art.
With these variations, your egg-decorating experience will become a cherished tradition that friends and family will look forward to year after year. So go ahead, get creative, and let the colors blossom!
Cooking Tips and Notes for Onion Skin Easter Eggs
Creating onion skin Easter eggs is a delightful way to embrace the beauty of natural dyes while crafting a unique celebration. The rich hues and intricate patterns resulting from onion skins not only provide artistic joy but also offer a sustainable alternative to commercial dyes. Here are some handy tips to enhance your egg-dyeing experience.
Choosing the Right Onions
For the most vibrant colors, yellow or red onions are your best friends. Yellow onions give off a warm, golden hue, while red onions can yield beautiful, reddish-brown tints. I’ve found that combining both types often results in stunning effects!
Egg Preparation
Make sure to use white eggs for the best results, as they take the dye more evenly. If you’re aiming for deeper colors, consider using older eggs, as the shells are slightly porous, allowing dyes to penetrate better.
Soaking Time Matters
The longer you soak your eggs in the onion skin dye, the richer the color will be. Typically, soaking for at least 45 minutes yields great results, but leaving them for several hours can enhance the depth of color.
Safety First
When boiling the eggs in dyed water, keep an eye on the temperature. A gentle simmer is key to prevent cracking. Using vinegar in the dye bath helps the colors set better.
By using these tips, your journey with onion skin Easter eggs will be both fun and rewarding! Enjoy the process, and don’t hesitate to experiment with different soaking times and onion combinations to make your egg-decorating experience truly unique.
Serving Suggestions for Onion Skin Easter Eggs
Elevating your onion skin Easter eggs isn’t just about the vibrant colors; it’s also about how you present them. Picture a sunny brunch table where these beautifully dyed eggs steal the show. Here are some serving suggestions to make them the star of your Easter celebration:
Charming Presentation Ideas
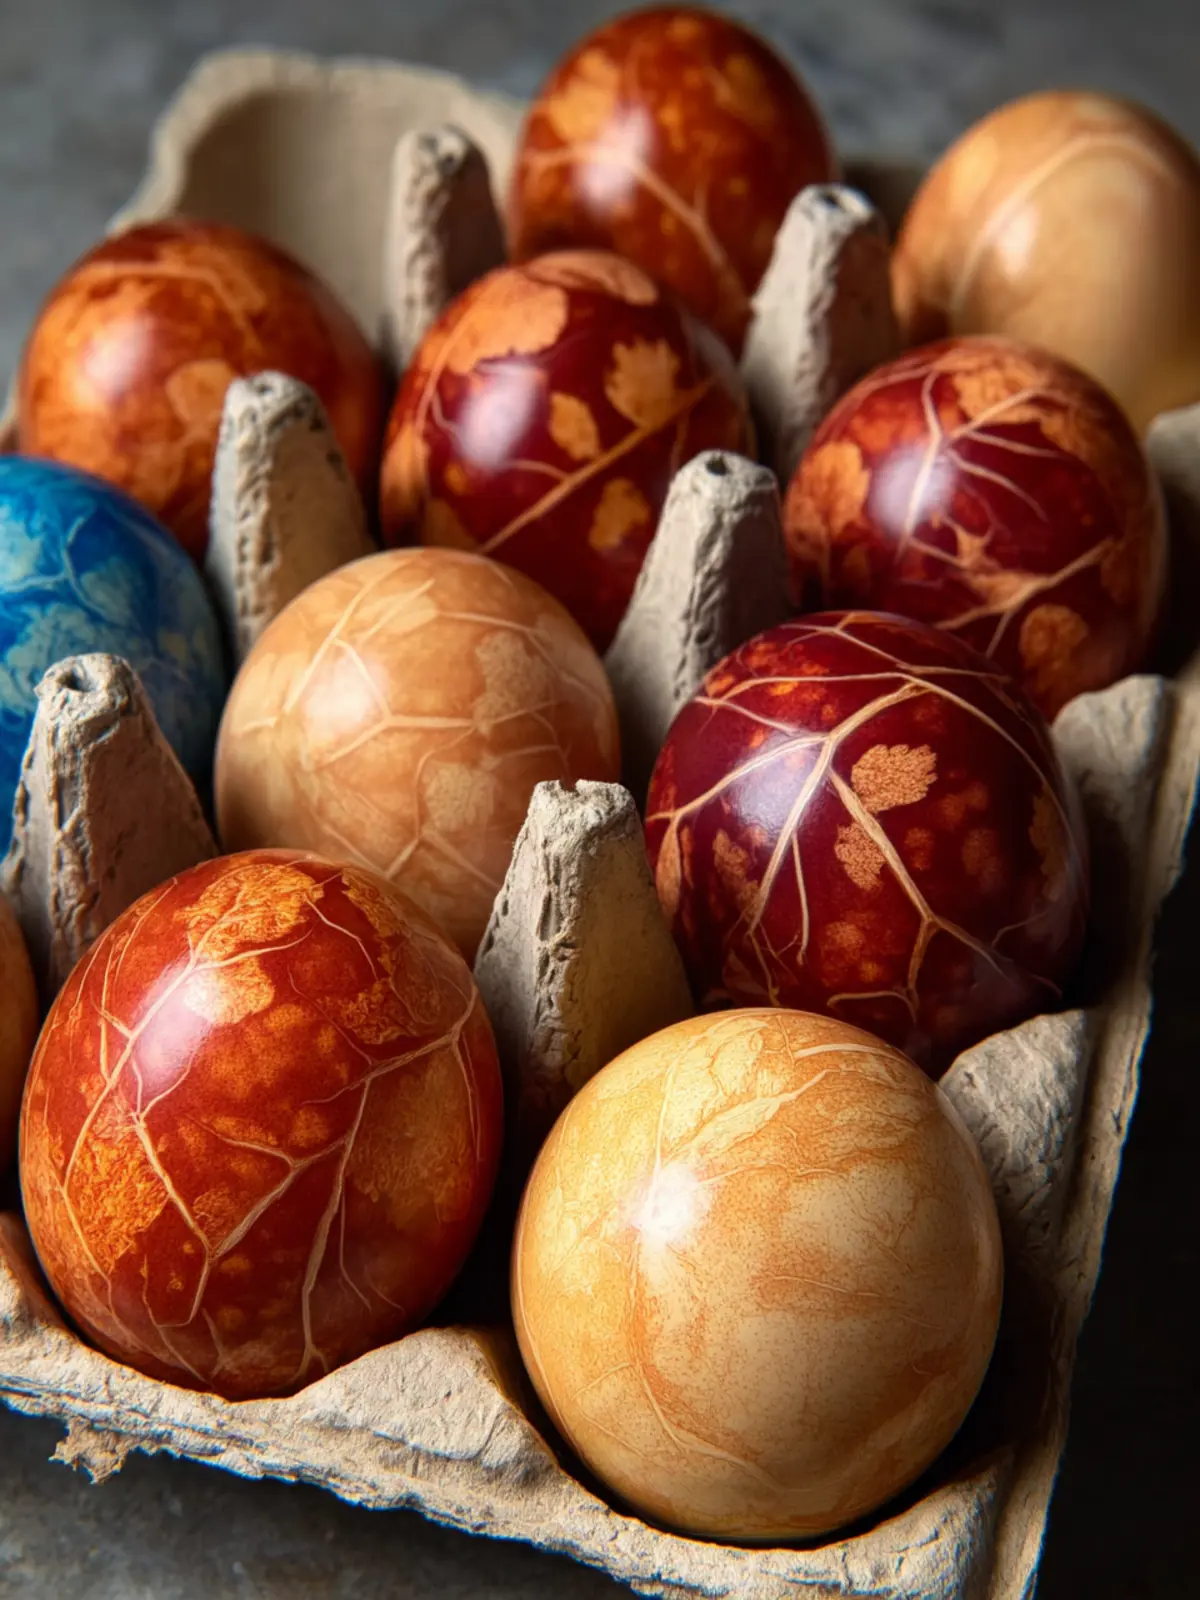
- Easter Basket: Arrange your onion skin Easter eggs in a decorative basket, lined with fresh grass or colorful tissue paper. This easy setup invites everyone to pick their favorites.
- Natural Accents: Enhance the earthy tones of the eggs by placing them among blooming wildflowers or herbs like rosemary. This brings a touch of nature to your table.
Creative Pairings
- Deviled Eggs: Spice things up by slicing a few eggs in half and transforming them into deviled eggs. The unique colors will surprise your guests!
- Seasoned Salads: Toss your eggs into a spring salad with mixed greens, radishes, and a light vinaigrette. Their striking appearance will make the dish even more appealing.
With these ideas, your onion skin Easter eggs can be not only a feast for the eyes but also a delicious centerpiece for your festive gathering. What will you create?
Time Breakdown for Onion Skin Easter Eggs
Creating onion skin Easter eggs is a delightful way to celebrate the season and embrace natural coloring techniques. Below is a simple breakdown of the time you’ll need for this beautiful project, ensuring a smooth experience from start to finish.
Preparation time
The prep for these onion skin Easter eggs takes about 20 minutes. This includes gathering your ingredients and carefully wrapping the eggs in onion skins.
Cooking time
Once your eggs are ready to go, the cooking time is approximately 30 minutes. This is when the colors develop beautifully, and the eggs infuse with the rich hues of the onion skins.
Total time
In total, you’ll need about 50 minutes to create your stunning onion skin Easter eggs. It’s a fun, creative process that allows you to enjoy some quality time in the kitchen. Plus, the vibrant results are totally worth the effort!
Nutritional Facts for Onion Skin Easter Eggs
When you embark on the fun journey of making onion skin Easter eggs, it’s essential to know just how nourishing they can be. These vibrant, natural eggs not only delight the eye but also add a unique touch to your Easter celebrations.
Calories
Each onion skin Easter egg contains approximately 70 calories. This makes them a light, guilt-free addition to your holiday festivities.
Protein
You’ll find around 6 grams of protein per egg, thanks to the egg itself. This provides a satisfying energy boost while indulging in this creative activity.
Sodium
With only about 60 milligrams of sodium, these eggs are a savory treat without overwhelming your diet. Celebrating with onion skin Easter eggs allows you to enjoy the season responsibly.
FAQs about Onion Skin Easter Eggs
Creating beautiful onion skin Easter eggs is not just about the dye; it’s about the overall experience of crafting something unique and personal. Many home chefs have questions that pop up while they delve into this natural dyeing method. Here are some common queries answered for you!
Exploring Other Natural Dyes
Absolutely! While onion skins are fantastic for dyeing, you can certainly experiment with other natural dyes. Options include:
- Beets: For a vibrant pink.
- Red Cabbage: Creating lovely blue tones.
- Turmeric: Offering a warm yellow hue.
Mixing and matching natural materials can lead to some truly stunning results.
Refrigerator Life of Dyed Eggs
Once you’ve created your stunning onion skin Easter eggs, it’s essential to know how long they last. Typically, dyed eggs can be stored in the refrigerator for about one week. Just be sure to keep them in a covered container to maintain freshness and prevent them from absorbing any strong odors.
Eating Your Artful Eggs
You might wonder whether it’s safe to eat the eggs after dyeing them. The good news is that yes, you can absolutely eat the onion skin Easter eggs! Just make sure to use food-safe techniques in the dyeing process. If you see any signs of spoilage after a week in the fridge, it’s best to err on the side of caution.
Embrace the creativity and beauty of this unique tradition with confidence!
Conclusion on Onion Skin Easter Eggs
Creating onion skin Easter eggs is not just a delightful activity; it’s also an eco-friendly twist on holiday traditions. The natural dyes extracted from onion skins give each egg a unique hue, reminiscent of a vibrant garden. Imagine gathering your friends and family, sharing stories and laughs while crafting these beautiful decorations. Once your eggs are completed, they make for stunning centerpieces or thoughtful gifts. Plus, you get the satisfaction of using natural ingredients and reducing waste. So, roll up your sleeves and dive into this charming seasonal craft—your Easter celebration will be that much more colorful!
Print
Natural Dyed Easter Eggs
- Total Time: 55 minutes
- Yield: 12 eggs 1x
- Diet: vegetarian
Description
Learn how to create beautiful, naturally dyed Easter eggs using onion skins and fresh herbs.
Ingredients
Scale
- 12 white eggs
- 3 cups packed onion skins (yellow + red for a deeper tone)
- 2 tsp white vinegar
- 2 quarts water
- 1 handful fresh herbs (parsley, clover, dill—whatever has a pretty shape)
- 1 little oil (for shine)
Instructions
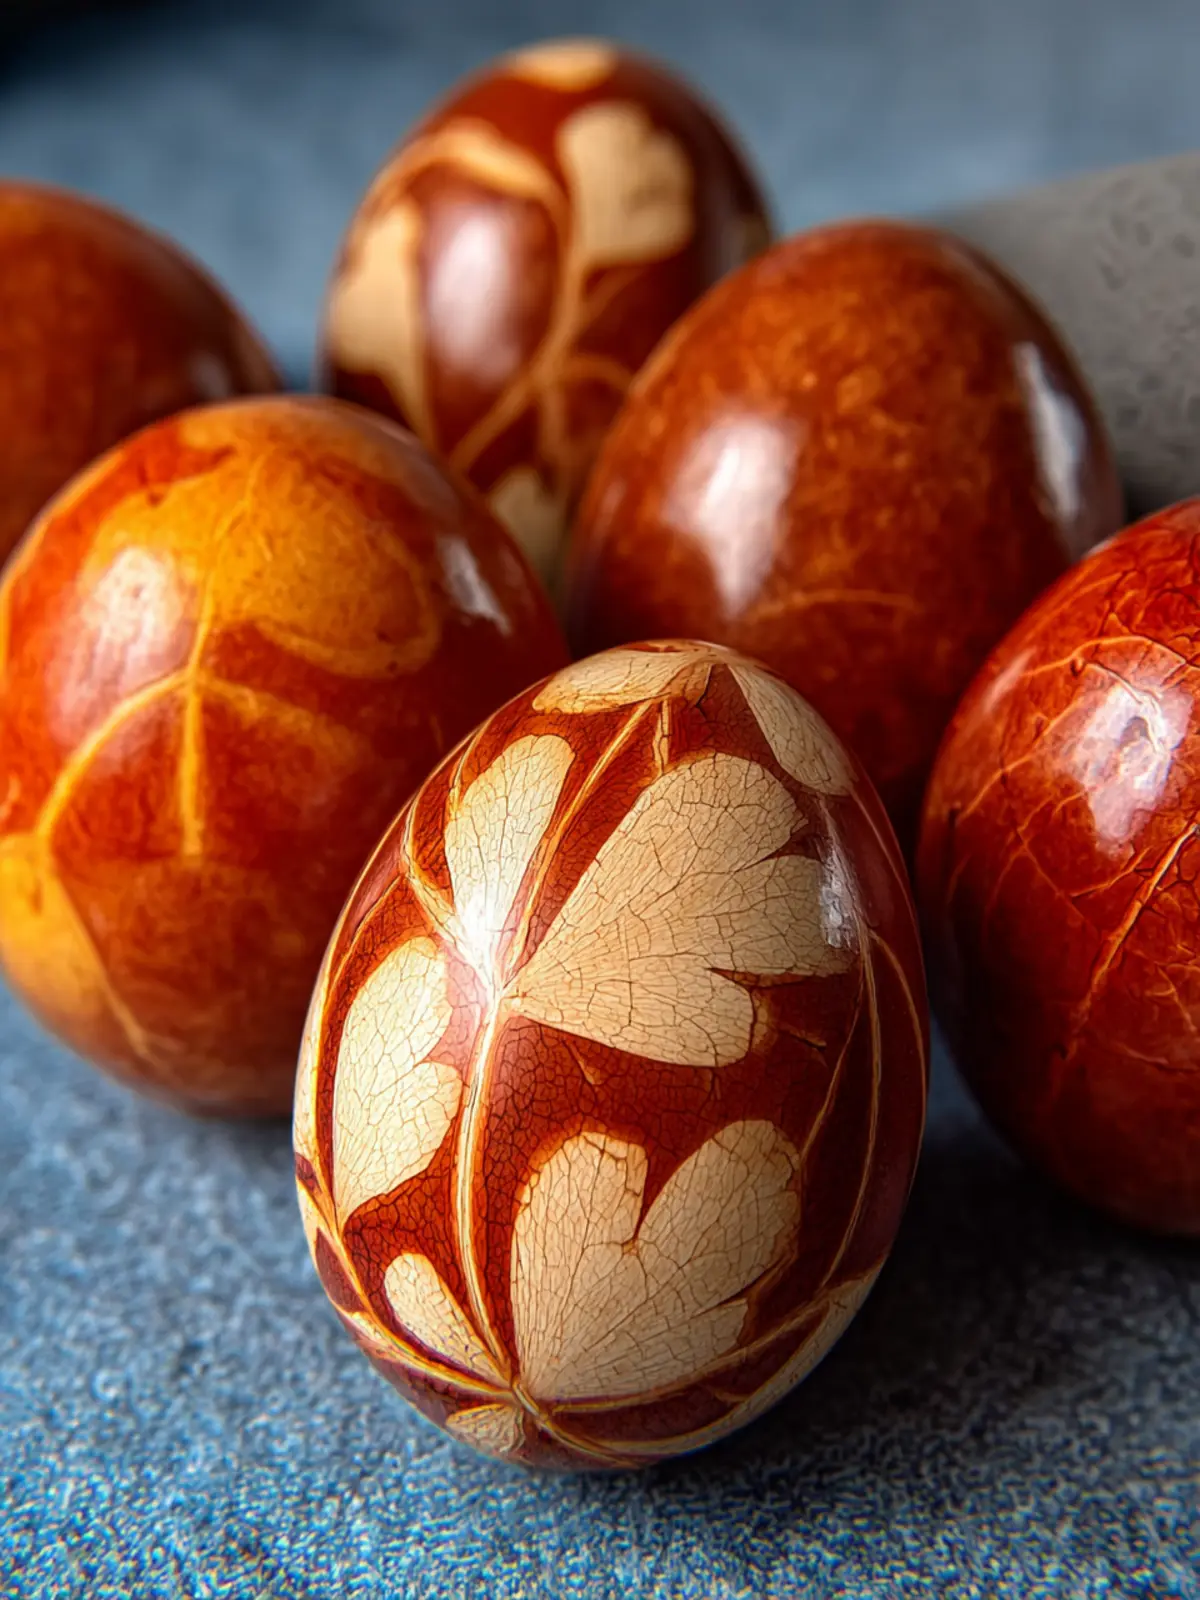
- Wash your eggs and gently press a leaf or herb onto each one. A bit of water helps it stick.
- Carefully place each egg into a cut piece of stocking, pull it snug, and tie off the ends to keep the herb in place.
- Layer the onion skins into a large pot and nestle the wrapped eggs on top.
- Add enough water to fully cover the eggs, then stir in the vinegar.
- Bring to a boil, then simmer for 10 minutes.
- Remove from heat, cover, and let them steep in the dye for 30 more minutes.
- Once cooled slightly, unwrap the eggs, peel off the herbs, and rub each one with a little oil to bring out the color.
Notes
- This technique uses natural ingredients for dyeing eggs, making it safe and fun for children.
- Experiment with different herbs for unique designs and fragrances.
- Prep Time: 15 minutes
- Cook Time: 40 minutes
- Category: Easter
- Method: boiling
- Cuisine: American
Nutrition
- Serving Size: 1 egg